Are you wondering how to add a user to your Google Search Console property? You’ve come to the right place. I will show you how in 3 easy steps.
Google Search Console is a powerful tool to help you monitor and improve your website’s performance in Google Search. If you have hired an SEO marketing company, agency or freelancer to help improve your website’s organic search rankings, chances are they are going to ask for access to your Google Search Console property.
If this is the case, hopefully you haven’t them your Google account login information. You should never do this!
In this step by step guide, I will show you the correct and easy way to add a user to your Google Search Console property, which will allow the proper individuals to access the necessary data and tools.
Here is what we will cover.
- Make Sure You Have A Google Search Console Property Set-Up.
- Access Your Google Search Console Property.
- Add A User To Your Google Search Console Property.
- Adding An Owner To Your Google Search Console Property (Optional).
1. Make Sure You Have A Google Search Console Property Set-Up
The first step is to make sure that you have a Google Search Console property set-up for your website.
I’m not going to cover how to accomplish this in this post, as this could be a separate guide in itself.
If you need to complete the set up, refer to Google’s guide for setting up a website property in Google Search Console.
Otherwise, let’s move on to the next step.
2. Access Your Google Search Console Property
Once you set up your website property in Google Search Console, or if you already completed this step previously, you are going to want to access your property.
To do this, navigate to your Google Search Console property home page. Make sure you are logged into the Google account that is associated with the property.
In the top left hand corner, click on the main menu icon to open the property menu. Then select the website property that you want to access from the list.

This will take you to your Google Search Console overview dashboard for the website property that you selected.
3. Add A User To Your Google Search Console Property
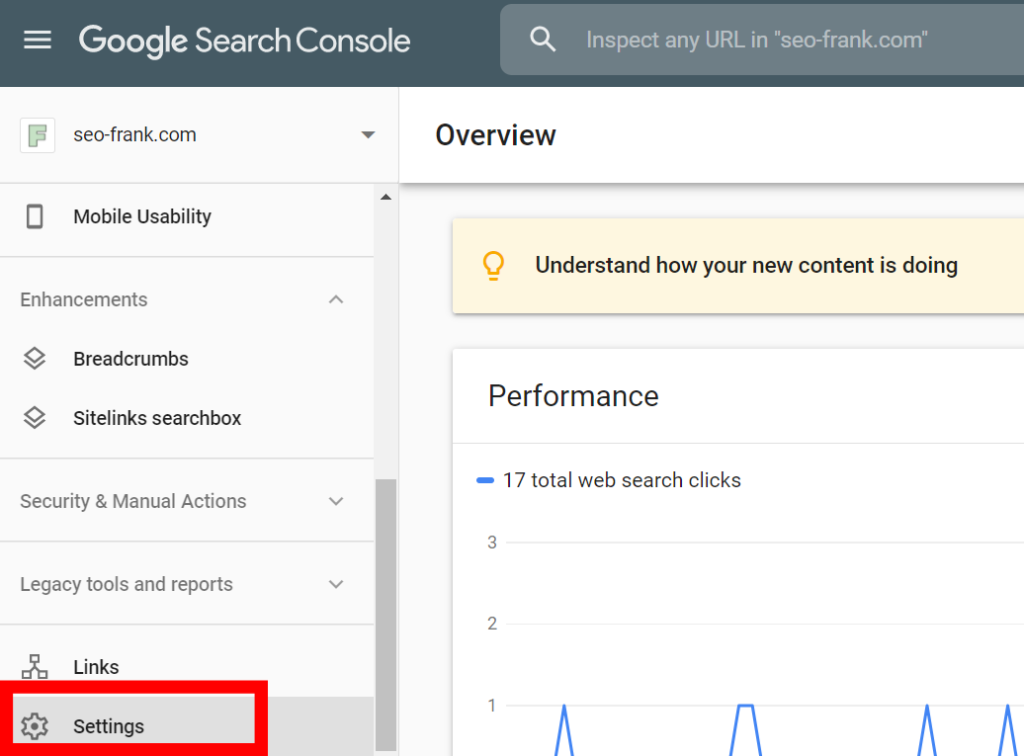
To add a user to your Google Search Console property, click on Settings, which is located near the bottom of the navigation menu on the left hand side of your screen.
In the settings section, click Users and permissions.
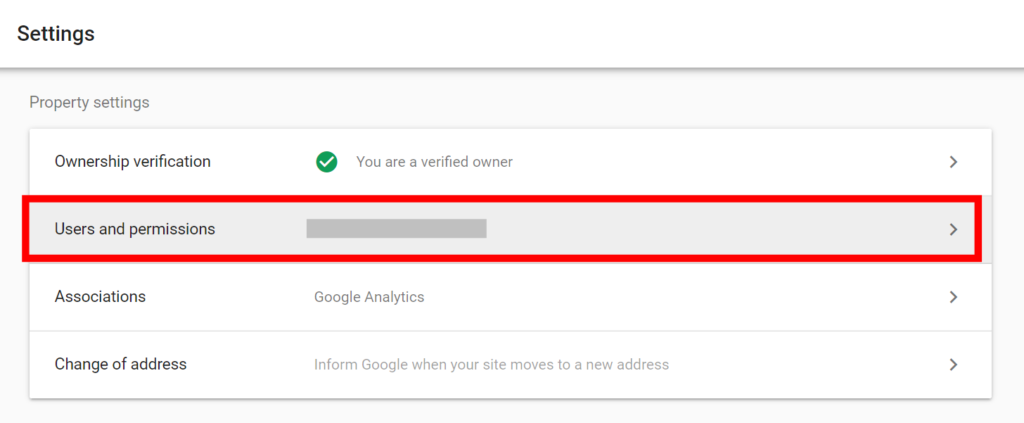
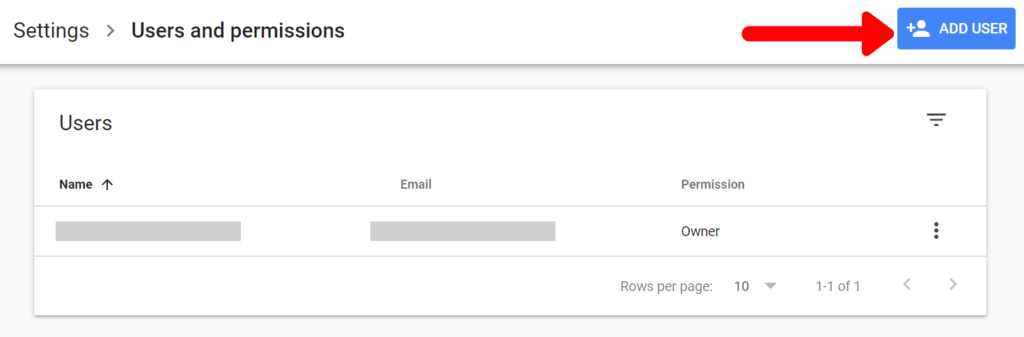
The users and permissions section will show you all the existing users who have access to your property, along with their respective permission level.
To add a new user to the property, click on the Add User button in the top right hand corner of the report.
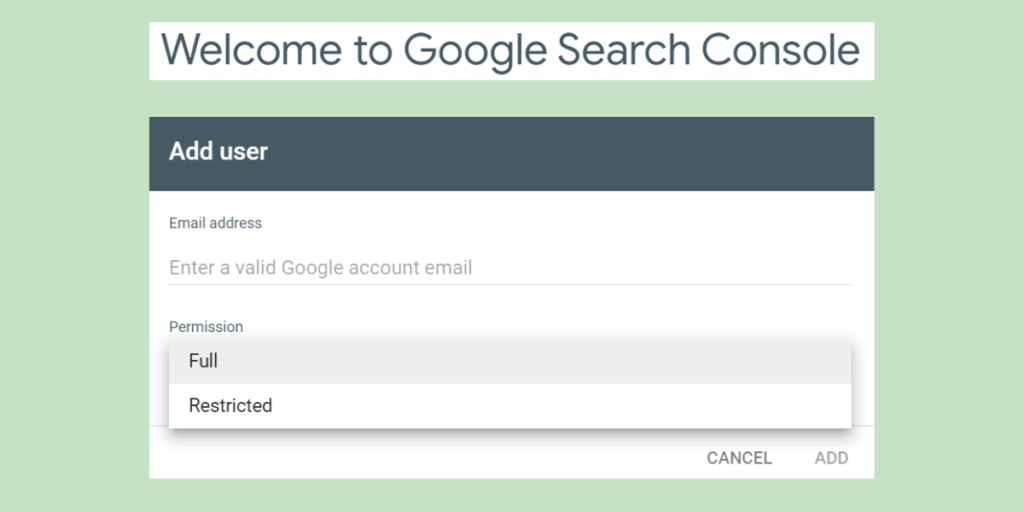
You will then need to enter the email address of the user you want to add. Keep in mind that the email address will need to be a valid Google account email in order to work.
Next, select the permission level you want to give to the user.
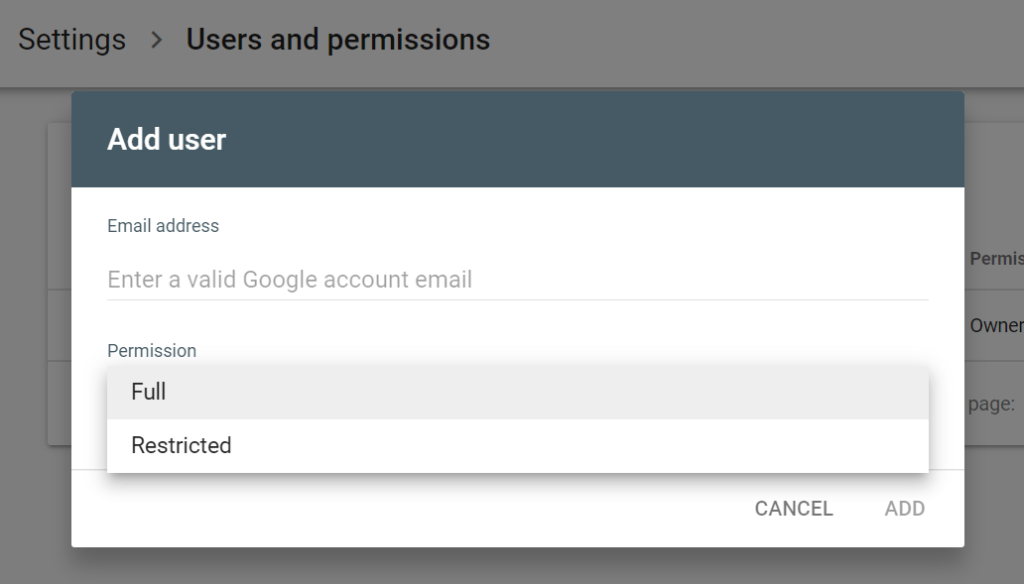
Selecting the correct permission level is important, so I am going to briefly go over the two different options that you have.
Selecting The Required Permission Level
In order to correctly select a permission level for the user that you want to add to your Google Search Console property, consider the following:
Full Permission Level
Users given a full permission level will be allowed to view and all data in your Google Search Console property. They will also be able to access most of the major tools and features.
I recommend giving the full permission level to anyone who you may have hired to do SEO or marketing work on your website. This will allow them to access all the necessary data and tools for them to properly perform the work on your site, without running into any restrictions or roadblocks.
Restricted Permission Level
Users given a restricted permission level will only be allowed to view the data and reports within your property.
I recommend giving the restricted permission level to individuals who only need to view or export data within your property. If you don’t want them to be able to use any of the tools, choose this permission level for them.
Once you have decided what permission level you want to grant to the new user, click Add at the bottom right corner of the screen.
That’s it! You’ve successfully added a new user to your Google Search Console property.
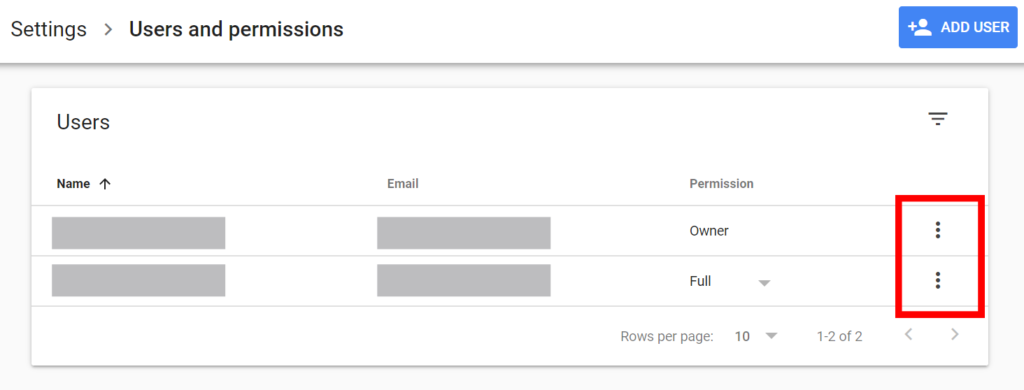
If you ever wish to remove an existing user, click on the 3 dots next to the respective user, and click Remove access. You can also change the permission level of an existing user underneath the Permission column.
Now that you’ve successfully added a new user to your property, you may want to go one step further and make a user a delegated owner of the property.
If you’re interested in doing so, let’s move on to the last step, which is optional.
4. Adding An Owner To Your Google Search Console Property (Optional)
Adding an owner to your Google Search Console property will grant that owner almost all of the permissions and rights that are granted to you, the verified owner.
In most cases, if you have hired someone to do SEO work on your site on your behalf, I recommend that you add them as a delegated owner. This will give them access to all the available tools and functions in your Google Search Console property.
Before, I show you how to add an owner to your property, I’m going to quickly go through some differences between delegated and verified owners.
Owner Information In Google Search Console
Verified Owners
A verified owner is the original owner of the property, or the individual who initially verified the Google Search Console property for the website.
Verified owners have full permissions and rights to every report, tool and setting available within Google Search Console.
If your property ever losses all it’s verified owners, the property will become inaccessible to everyone. This includes all delegated owners, which I will talk about more below.
Delegated Owners
A delegated owner is someone that is granted ownership of the property from the verified owner.
Delegated owners have most of the same permissions and rights that are given to verified owners, minus the ability to add or remove users.
Now that you know some background on verified and delegated owners, let me show you how to add a a delegated owner to your property.
First, click on Manage property owners, next to your name (assuming you are the verified owner), in the users and permissions section.

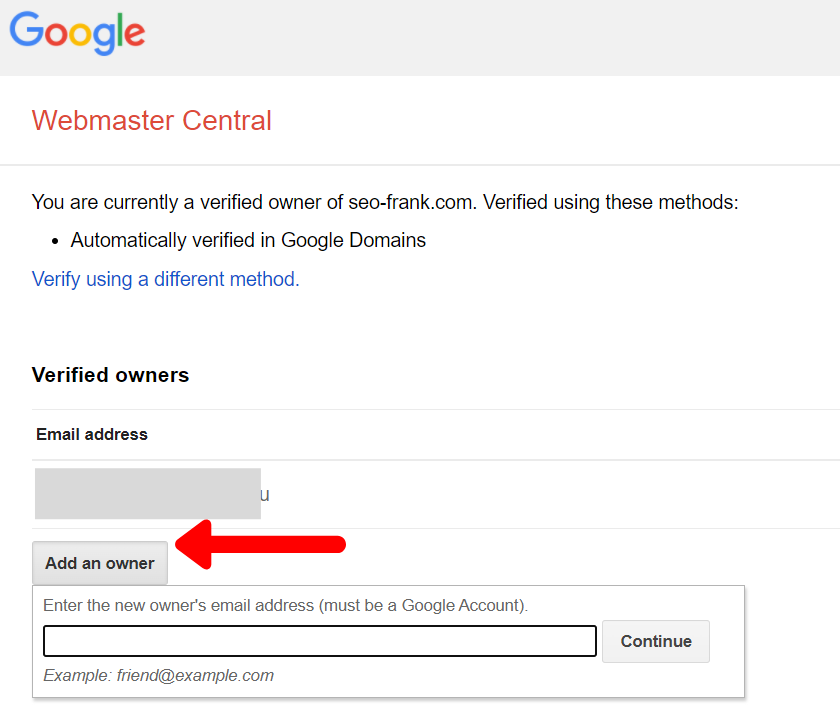
This will take you to the Google Webmaster Central page for your property.
If you click on your property in the Properties list, you will be taken to a page where you can add an owner to your property. Enter the email address of the individual that you want to add as a delegated owner. Once again, the email must be a valid Google account email.
If you ever wish to remove an owner from your Google Search Console property, use Google Webmaster Central to do so. Click Unverify next to an existing owners name in the list, and they will be removed as an owner from your property.

Conclusion
Adding a user to your Google Search Console property is an easy but necessary step to give the proper individuals the ability to perform SEO work on your website.
Remember, you should never give anyone your Google account login information. Always add a user to your property using the steps that we just covered.
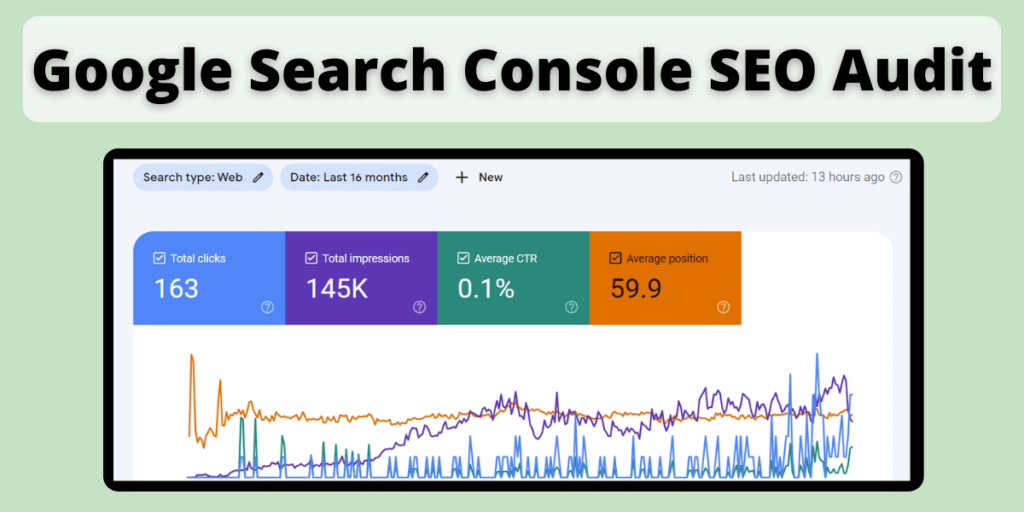
If you are looking for a way to use Google Search Console to improve your website’s performance in Google Search, check out my guide for conducting an SEO audit of your website using Google Search Console.
Thanks for reading.